Showing posts with label For beginners. Show all posts

Monday, March 10, 2014

Finished Project: straight skirt

Straight skirts- you can find them everywhere! Here is a little number I saw at Walmart this morning. $21? When straight skirts are so easy to make! No need to buy- I found some cute fabric on sale for $1.50 a yard! Perfect for someone learning to sew.

I modified my skirt from the tutorial that I shared on Friday.  Instead of two side seams, I just made a tube- having only one back seam.
I started by measuring my widest part. (I don't want my skirt to be too tight around my thighs.)
 
 
The fabric is folded in half- so I cut my measurement in half but added back an inch for my seam.
I also measured how long I wanted this skirt plus an inch for the hem.
I stitched up the back seam (so it would lay flat and not bubble over my butt), and then folded over the top- to make a casing for the elastic.
I measured my waist and that was the length of the elastic to this measurement.
Super simple skirt!
Fast and straight stitches- right in my comfort zone!

Cute-  but maybe too much in my comfort zone?
I mean... I want to learn to sew.. using patterns.
So my next project is going to be with a pattern! (gulp)
There! I've committed myself!

 
Here I am at work.  I am trying to be better about taking pictures out and about-
and not sneaking around in bathrooms snapping pictures.
(But no promises- you might see more pictures in bathrooms.
You've been warned.)


Friday, March 7, 2014

Inspiration: Simple Pencil skirt

I've made two of these types of simple skirts. Merrick is so adorable and her restyles- seem simple enough.

Here she shares a tutorial on how to make a simple skirt.

These are so cute! And really a great simple project for the beginner seamstress.
This might be a project I tackle with my "daughter-for-a-week".
We'll see if she is interested in learning how to sew.
 
It just seems silly to buy this type of skirt. Pay $20? or more? what for?
Thanks Merrick for your cute re-styles and great tutorials!

Monday, March 3, 2014

Sewing Project: Reversable Bag

I have needed a new "scripture" bag for months... maybe a year. My cute bag I used in Hawaii- gave up, and broke down. :0( It didn't like the transition to Utah climate.

I found a really cute tote pattern at Joann.com. You can see it here and download the pattern!

I decided, after looking at the pattern, I might need to find a easier pattern. I wanted to use supplies I had on hand- and I don't have any batting required for the Zest Tote. (Although it is adorable!)

So I found a great bag, with a wonderful tutorial by Very Purple Person, she even provides a free pattern to download! (Click HERE)


Happily this pattern fits perfectly on the boot cut portion of my jeans I wanted to re-purpose into my new scripture bag.
 (Cute jeans- right? Sadly they don't fit.)


I followed the pattern.
I read and re-read the tutorial.
It was a great/fun project that took me about 6 hours from start to finish.
 
One side is sturdy denim

The other is made from extra curtain/couch pillow fabric- lol!


Sew so cute! I would highly recommend this project for a newbie.

Friday, February 21, 2014

Fitting a pattern

Okay for the last Project Sewn next week the theme is "signature style".
 Make something that is my strength. I kinda did that already on my flannel skirt. (click here) Tube skirts I would say are my strength. So instead of sewing another one- I thought I stretch myself.

I bought a simple pattern on sale- $1.99! (love that!) And the fabric that matches this pattern was also on sale 40% off at JoAnn Fabric. (I will admit. I kept those two elements in mind when I was looking for a pattern to buy.)

This pattern is a fitted, knit/interlock fabric dress. Simple construction, no zippers and such. I am a little scared because I don't normally wear "fitted". But I thought having a simple shell dress that I can wear my cute cardigans with, might be a great staple in my wardrobe.

I found a great youtube video - on how to fit a pattern.
I really want to learn how to do this- so when I sew my fabric together- there isn't major re-constructive surgery going on. A little tweaking is fine- but I don't want to have a bag- that I have to form fit to my body.
(or worse yet- there isn't enough fabric to tweak with in my hips area!)

For this pattern, my body measurements said I was an 8 for my bust area and a size 12 in my hips. (I told you- I am a classic PEAR) Instead of buying two different patterns, I bought the size 8- but enough fabric for the size 12 so I can alter the pattern myself in the hips and have enough fabric to do that.

Thanks Joy Bernhardt for such a clear- easy to follow tutorial!

Wish me luck! I will show you my finished project on Monday!!

Monday, February 10, 2014

RED elephant shirt

Think Pink- challenge at Project Sewn!
I love how it is motivating me on my goal this year to: LEARN HOW TO SEW.

I need your suggestions!
I got this great blouse from Deseret Industries.
(A bit big) After thinking about PINK for a week, I thought I could use a cute RED blouse in my life.

(Shown here with my cute skirt from last weeks Project Sewn challenge.)
This is where I need your help!

 I thought it would be an easy project:
Take off the sleeves.
Re size the sides.
Reset the sleeves.
 
As you can tell- Not a great success story- .... yet!
I don't want to give up on this project, because the color is great!
 
Once "fixed" it will be an amazing addition to my "work wardrobe".
 
So I need some advice.
Hind-sight being 20/20- I maybe should NOT have taken the sleeves off.
I should have re-sized it like my coral sweater... just one seam, up both sides, including the sleeves in the seam. BUT I can't change that now.
 
Any suggestions?
 

Wednesday, February 5, 2014

Project Sewn: Week One- Attempt 2

I just couldn't leave the first challenge that way- with a DIY Fail. It just left such a bad taste in my soul.... my little, budding, sewing soul...

And especially- when the challenge was to be inspired by a fashion icon- my favorite!
Princess Kate!

So back to Pinterest to find a picture of something I could sew!

I won't make you wait for it. This is the cute skirt I made- inspired by this image of Kate.


I couldn't find the red tartan fabric.
I could find this flannel fabric.

Yes this is a flannel skirt- reminds me of my flannel pajamas growing up! I can see this quickly becoming my favorite skirt.


The reason I labeled my project: Braveheart Inspired on Project Sewn is...
as I was sewing this skirt, my husband walked into the room and asked,
 "Are you going to unite the clan?" Braveheart is his favorite movie- all time, so I knew exactly what he was referring to. lol.

It helped me giggle my way through the project until the skirt was finished. All the picking out and pinning etc. I mean, for an experienced seamstress.. this is probably an hour-project not two days.

After looking at some other people's projects on Project Sewn, especially Kristi (click here), I thought I needed to add lining to this skirt.. lining really makes a sewing project seem more professional and less home-spun. Also, I thought lining will help this skirt hold it's shape better (since it is made out of flannel) and not bunch up when being worn with tights.

I have never, NEVER ever lined anything!  Since this skirt is just a tube...I thought I would be able to handle it.
 
(Spoiler Alert: This is extra fabric from a future Project Sewn assignment. )

Look at the hem! no.. really LOOK AT IT! I did a dang good job!
My son helped me with the pictures, he said "Why are you standing like that?"

I don't know what I am doing?... awkward model syndrome.
 

Besides the awkward photos- the skirt turned out cute! (and comfy!)

I love /live for comments - they really help me stay positive as I try to learn how to sew.
So thanks for taking the time!
Laura

Monday, February 3, 2014

Fashion Icon Challenge

I never never NEVER find these types of challenges, while they are happening. I was so excited two days ago when I saw Ladybird post about this Project Sewn challenge that was starting today!
 
I just had to play along.
 
I am determined to fashion a working/functional wardrobe. I am not going to keep clothes I don't love- anymore! Life is too short. ( And my closet too small ..HA!) So I am being fearless this year. I am reconstructing my clothes to fit me and be fashionable... or it is being destroyed in the process ... and can no longer hang in my closet.
 
Today, the challenge was be inspired by a fashion icon.
 
 
I picked Kate Middleton.
 
 
I love this color palette. Baby blue and brown. So cute right?
I have a brown skirt- that I love. I thought I would try to make a cute baby blue top inspired by this blazer.
 
I don't have a cute blue blazer- but I did have a baby blue linen dress. (That I loved, back in the day, before I got rust stains on the skirt. I haven't worn it in years. But haven't been able to toss it.)
 
I seam ripped the sleeves off and cut some length off.
 
Then using a tip from Kristina's book/blog- I cut new sleeves. (I want longer sleeves.)
 
 
Things were going along... fine. The sleeves turned out! That was a happy moment in the project.
I wasn't too happy about the shape of the shirt. It is looking pretty maternity.
 
So, I thought I would move along to the detail- that I loved from Kate's jacket. The brown collar.
 
 
I had some brown/tapestry type of fabric- and added to the collar of this shirt.
I'll let you judge for yourself.
 
 
This project turned out pretty home-spun.
 
This is pretty bad... but I just had to laugh. I wanted to play along so bad on the Project Sewn Challenge... but I am a DIY baby. I am still learning. Kristina warns in her book- that when adding elements to clothes- they need to look like they belong. This collar- sticks out. I mean, if the shape wasn't so horrible- I maybe could save this shirt by adding brown big buttons, etc.. but I am tossing in the towel. The shape is just too wrong- for what look I was going for.
 
Lesson learned? Shape matters!
 
My husband did a double take- from watching the super bowl and said, "That's not your blue dress-- is it? I LIKED that blue dress!"
 
ah. yeah...
There are going to be casualties in this "learning to sew" goal.
 
(I didn't hem the sleeves-) But I am proud that I was able to alter/modify the sleeves.  (If I am trying to see the positive side of this DIY failure.)
I can't wait to see everyone's amazing creations for this challenge!
 
casualty count: 2
Kristina said she had about 37 clothing items die in her learning process. I am giving myself an even 40. If I learn to sew, and create a wardrobe I love and loose less than 40 items of clothing... I will have done a good job.


Friday, January 31, 2014

Color Challenge: Navy Blue

So I have been thinking about this idea of color schemes.
I feel very dumb.

I searched some more sites- trying to wrap my brain around these concepts.
I found this site VERY very very helpful. (www.tigercolor.com)

I was getting kinda overwhelmed at the task of looking- analyzing all my clothes.
So I decided to pick a color range to work with. I like Navy Blue- I own a lot of it. (mostly jeans) So I thought I would start there.
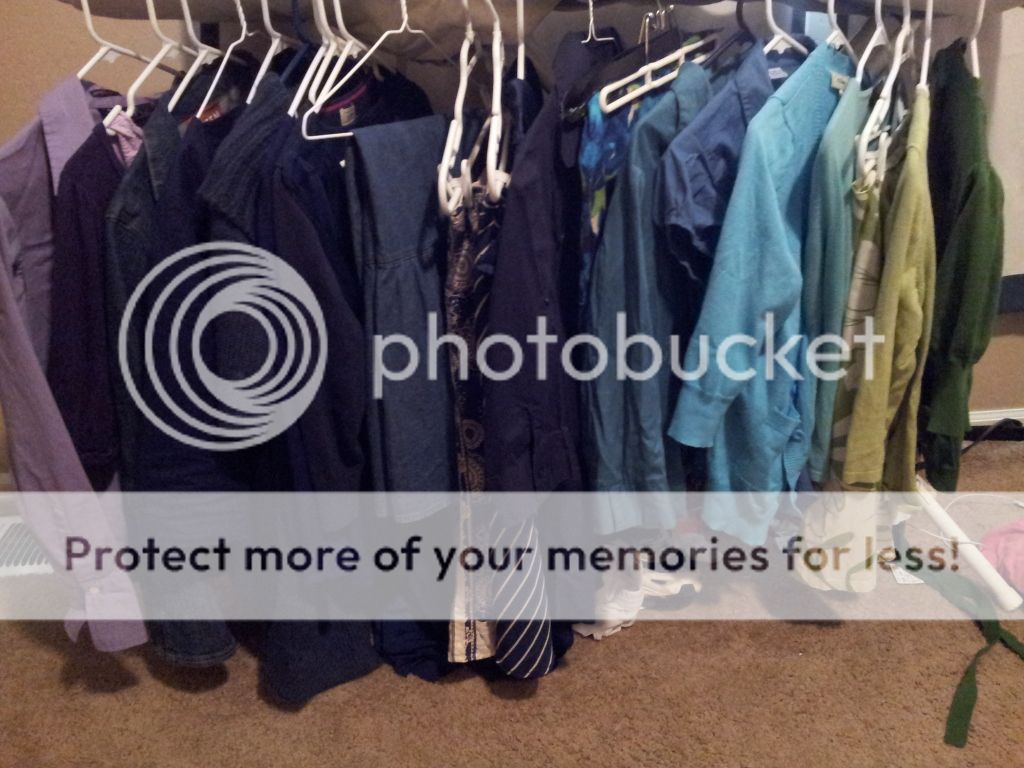
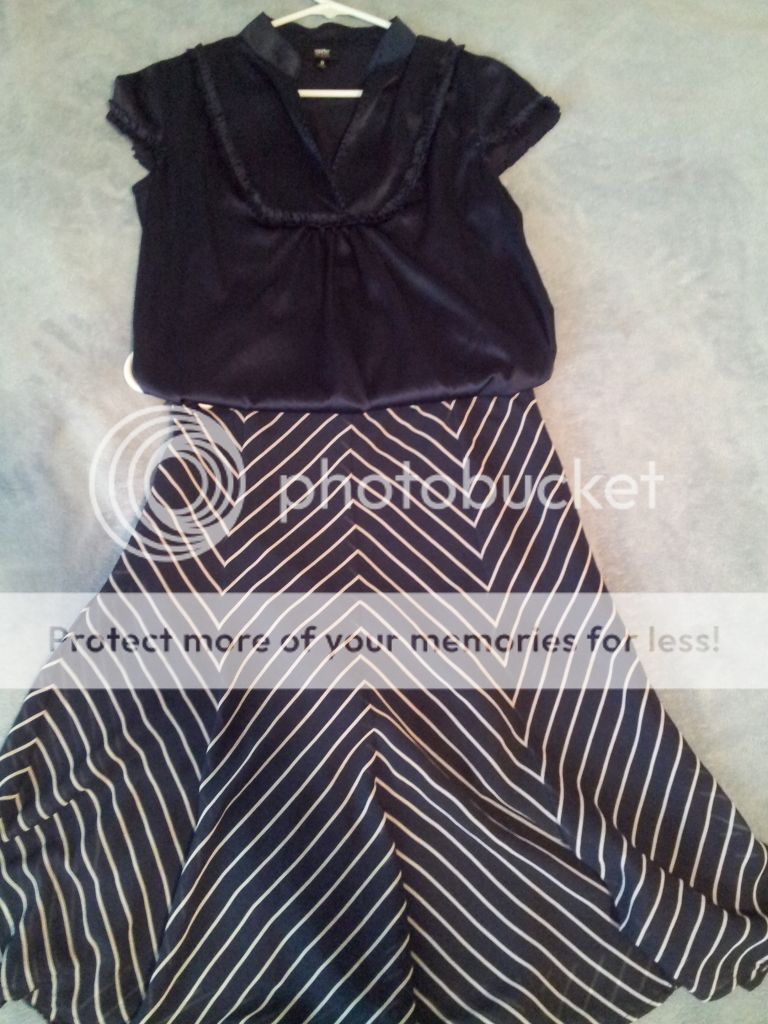
I found all my Navy blue items (4 sweaters, 2 jackets, 1 dress, 2 shirts, 4 skirts)
Then I grabbed the colors next to blue on the color wheel.
I have two purple shirts ( that I rarely wear- almost never.)
I have 2 turquoise shirts, two turquoise sweaters (I wear a lot with jeans or khaki pants)
I have two green sweaters and one skirt
 
Those were my players today.
 
I am going to post FIRST in the line up- my normal outfit for church or whatnot.
 Then the next photos in the same row are NEW outfit combinations.


(Normal)                             Never thought about these two. (Last one I could even wear interpreting!!)
I actually bought
this all together.


I normally don't wear this dress- but by itself. I think I got out of the habit of "layering" while we lived in Hawaii for 8 years. Once I saw that green sweater over the blue dress-- I fell in love with that dress all over again! What a gem I had hidden in my closet!
Look how cute it looks!

Adorable.

This is another snooze outfit of mine.
 

(Sorry about the lighting- the sun was setting. There was GREAT light for about 30 min.)
Here are two new options for this cute skirt!


I also didn't realize what a gem this green sweater is! I honestly only (use) to wear it with that one skirt. Look how cute it is with this skirt!
And I love the look of denim jacket and skirt.. how cute is that?


Here is a snoozer outfit I normally wear with this skirt. (on the left)
Remember the cute outfit I just created?

Did you notice that of all the outfits I posted- only a handful I could wear to work? I love white shirts! I need fashion counseling  therapy about a work wardrobe.

The good thing about this exercise is... you see where the holes are in your wardrobe. Belts- I am lacking and cardigan sweaters are delightful! I want about a million more- after I saw the transformation of that one dress!

Friday, January 24, 2014

Color: Part One

Kristina has a blog post about Color Scheming.
I am clue-less about this so I tagged it as a tutorial I wanted to read-think-experiment with more.

She always looks amazing- but effortlessly put together! How is that possible? Because she knows how to combine color.

After reading her post- I realized I needed a refresher course on the color wheel. (lol)
I grabbed this from a great website (click here) at the Virtual Instructor.
She created this wheel to teach students about complimentary colors. Just what I need!

The Virtual Instructor has this color wheel too. I like it because it shows more shades of these colors.
So my goal by next Friday-  is to post some outfits, NEW outfit combinations, I've created thinking about color schemes.

Feel free to play along! Contact me with your combinations! (laurabethblum(at)yahoo.com) Make sure to put in the subject header: Color Scheme.

Friday, January 17, 2014

THE BOOK

I just got my copy of The Chic Girl's Guide to One-of-a-kind Wardrobe by Kristina Clemens.
Sign me up for the sequel!

I am giddy. Because I have been attempting to restyle fashion my clothes for years! (with not much satisfaction- I should add.) But I lack a lot of the knowledge about clothes construction and sewing skills- so my refashioned items looked very home spun.

Kristina has the skill set I lack. She truly understands  how clothes are constructed and walks the reader through the process of evaluating if a garment is a good candidate for being restyled or not.

She has great advice about fabric colors too. Which colors are easier to match and which are impossible.
If you have set the goal to alter your clothes- this is a must have book- in my opinion.
I am so so happy I splurged to buy the book.


If you have an interest in tailoring your own clothes- this is a great book to have in your back pocket!
I am so glad I bought it! Really.

It's not a typical DIY book- full of craft projects.
It really feels like a cheat-sheet to professional tailoring secrets, that a normal person would have to go through years of schooling to learn... but Kristina has written the cliff notes!

I am in love with the book- and love that some of my garments in my queue-- fit many of the projects she illustrates.

I can't wait to try some of her techniques!

Monday, December 30, 2013

Project Journal

 
This images comes from Lladybird.com- (you can click here to see her review) (and learn where you can buy one for yourself)

I really like this idea of keeping a journal/log book of my projects.
Mainly to record the mistakes I make- so the NEXT time I attempt a similar project I wont repeat the same error.

For example: I might have a page that just records different techniques I've tried in placing a zipper! Or tricks I've tried to achieve the perfect button hole.

But I am sure every seamstress learns a lesson or two- with each project.
Perhaps a pattern brand that was easy to follow- or happens to fit better than another

Types of fabrics that are better to use for one project and not so fun to work with for another kind of project.

I love this idea so much- and doubly so- that I saw it BEFORE I really have begun my year of sewing! (It would be "classic Swirl" to find it 8 months into the goal and then have to try and recreate it.)

I don't have very many patterns yet- but I am sure I will be collecting a few. This journal has a section to log all your patterns.

That is brilliant! Especially since I learned a tip- that instead of buying a bunch of patterns to create a new dress... just mix and match your patterns... especially when you've already altered the old one to fit your measurements. (I can only dream- that I will get to that level of sewing!)

So- I am enjoying the last few days of 2013.. preparing myself to JUMP in with my sewing goals. That really is so unlike me.

Normally I JUMP first and then plan as I go- but we are out of town visiting my in-laws- far far away from my sewing machine. So it has forced me to think and prepare more.

I love it- wish I would do that more often... procrastinate my impulsiveness a bit more.

Anyway- I a great idea I wanted to share with fellow newbies.


Friday, December 27, 2013

How to avoid DIY Epic Fail!

Kristina- I hope you don't mind my obsession with your site. Do you? do you? do you??
It feels creepy being a (blog) stalker.
I did buy her book...


 so maybe I am more of an admiring fan/customer? That is not creepy at all. Actually I would prefer to think of myself as her apprentice-- her "little grasshopper".. (okay- it's getting creepy again.)

I'll stop.

I just really like her blog- it's like she is reading my mind!
I worry about Epic Failure... and what do you know?? She has a blog post about how to avoid that!


visit her blog HERE to glean from her great wisdom
I love that she admits ( and even kept count) that 37 garments have died in her experimentation process. So I have to accept: FAILURE WILL HAPPEN.
It will!
 
I am hoping and optimistic that I'll be able to learn from my mistakes and not repeat them a million times... by keeping a project journal.
 
I paid close attention to step #3.
 
THE BASICS  before you start a project, check to see if you have these basic items on hand.
  • Fabric--not optional, sorry...through you're welcome to try. That would be very "The Emperor's New Clothes" of you. (This would be my #5 stockpile. My already bursting closet with clothes that don't fit me.)
  • Fabric Scissors--unless you have a talent for rending things with your teeth, invest in a good pair of fabric scissors. (check)
  • Dressmaker's Pins--If you pin before sewing, your projects will just look better. I promise. (yup)
  • Tape Measure--Use it, use it, use it. (Note: Use it.) (Okay.. I get it! I will find mine. lol)
  • Fade-away Marker--convenient for making seam or embellishment placement. The ink fades in 48 hours, but test on a scrap of your fabric first. (Need to get- this sounds wonderful- instead of the sharpie I always seem to find laying around.)
  • Black, white and navy thread--Gotta have 'em. These colors will work for most sewing projects. (Good to note which colors to buy.)
  • Seam ripper--it's your new best friend. A nifty little tool to help you tear out mistakes (which you're gonna need no matter how awesome you are). (I already have two or three.)

OKAY! and seriously I have to check out the tutorial on adding details to a plain dress. (Click HERE!) It's not rocket science- I know.. by why am I always amazed at her creations?

I was thinking- I wish I had access to HER closet. Everything is so cute! (But age appropriate Cute- not kindergarten cute.) And then I quickly remembered... by the end of the year... MY closet will hold just as adorable clothes. (that's the goal anyway...)

If anything- it will hold A-LOT LESS clothes... because not everything will turn out runway ready.


Tuesday, August 31, 2010

Sew Simple Bracelet!


Kathy
(my sister's sister-in-law)
is sharing this
SEW SIMPLE idea.


After seeing these type of fabric bracelets in stores-
she figured she could make them on her own- for less$

These are ADORABLE!
Using just fabric scraps
some wide elastics
and some basic sewing skills.
I love this project!
Thanks Kathy for sharing- perfect project for our girls!
Tutorial is found HERE-
if you try your hand at this project... be sure to let us see your results!